
Accidental deletion is one of the biggest reasons behind data loss. Many Mac users unknowingly delete important Word documents from their Mac while freeing up storage space. Losing a vital Word document containing business reports, lecture notes, thesis, or more on your Mac is stressful.
What are the Ways to Recover Deleted Word Documents on a Mac?
Recovering a deleted Word document on a Mac is simple. However, there are a few points that can make or break the recovery:
- You have saved the Word document.
- You haven’t emptied the Trash.
- You haven’t used the option + command + delete shortcut to delete a file permanently.
- The AutoSave feature is enabled in the MS Word application.
- You haven’t shut down the Mac after deleting the file.
Let’s look at the methods to recover lost or deleted Word documents on Mac.
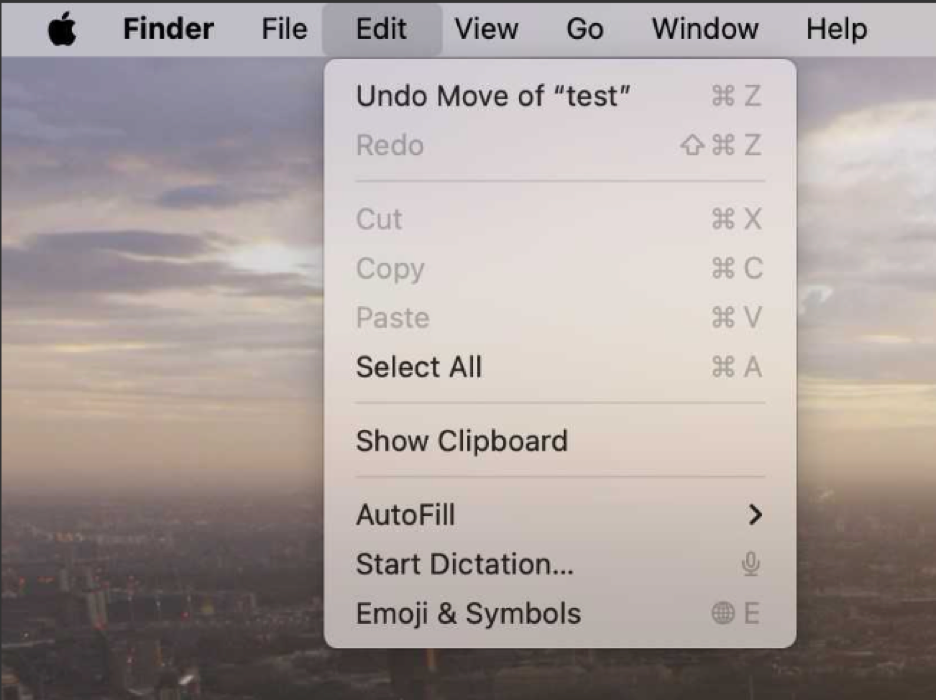
Method 1: Recover Deleted File/Folder Using the Undo Function
If you have recently moved an important Word document to the Trash, the easiest way to recover it is by undoing the action. This will restore the deleted file to its original location. Here is what to do:
- Click on Edit in the Menu Bar at the top.
- Click on Undo Move of.
Note – You can also use the Command + Z shortcut to restore a recently deleted Word document.
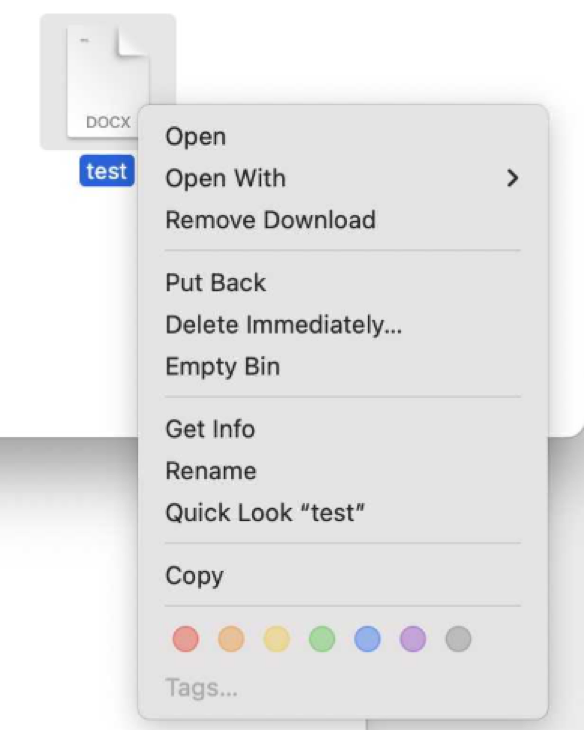
Method 2: Recover Deleted Word File from Trash
Another way to recover deleted Word documents on a Mac is from the Trash. All the files that you delete are stored in Trash, which stores them for 30 days. During this timeframe, you can go there to restore the deleted files. After 30 days, the Trash is automatically emptied.
If you have deleted a Word document on Mac, you can look for it in the Trash and restore it. Follow the steps below to do this:
- Open Trash from the Dock.
- Look for the deleted Word file in the Trash. Once you find it, select it.
- Use the two-finger tap gesture on it and click on Put Back.
Method 3: Use an External Drive Backup
If you have created a backup of your important files, including Word documents, you can easily use it to recover lost Word documents on your Mac. All you need to do is connect the drive to your Mac device and locate the file on it.
Method 4: Use iCloud Drive to Recover Deleted Word Documents
You can use the iCloud Drive on your Mac to recover Word documents or other files deleted from your iCloud Drive or other applications. To use this, log on to iCloud(dot)com and follow the steps mentioned below:
- Launch a web browser on your Mac and go to iCloud(dot)com.
- Log in with your Apple account credentials. Once done, click on Drive.

- Click on Recently Deleted in the left pane.
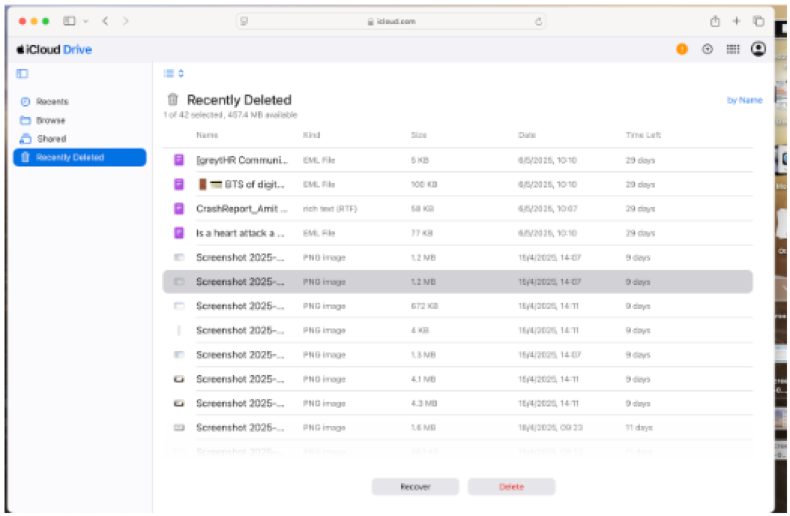
- Locate the Word file deleted file you have accidentally deleted and select it.
- Press the 3-dot icon and click on Recover.

If you regularly back up your files to an off-site location such as Google Drive, OneDrive, or Dropbox, log in and recover deleted Word files using it.
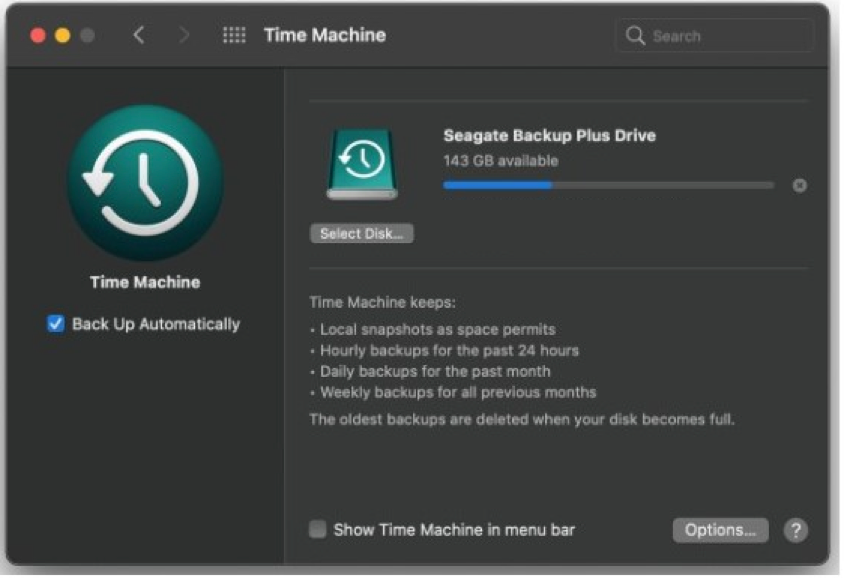
Method 5: Use Time Machine to Recover Accidentally Deleted Files on Mac
Time Machine is a feature that comes with every Mac. If configured with either an external storage drive or an Apple AirPort Time Capsule, you can use it to create periodic snapshots of your system files and important data.
Hence, if you have configured Time Machine on your system, you can use it to recover permanently deleted Word documents on Mac.
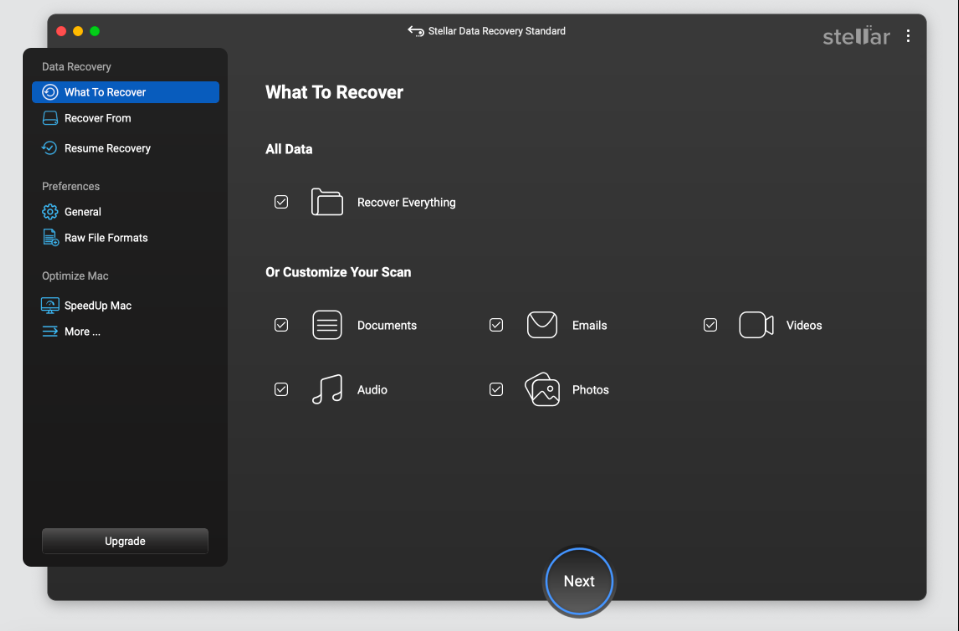
Method 6: Recover Deleted Word Files Using a Mac Data Recovery Software
If you have accidentally used the option + command + delete shortcut to permanently delete a Word document and you don’t have any backup to restore it, stop using your Mac immediately. Also, don’t shut it down as the TRIM command could make file recovery impossible.
In such a scenario, you can take the help of an advanced Mac data recovery software like Stellar Data Recovery for Mac. This powerful file recovery tool allows you to recover accidentally deleted files, Word documents, media files such as photos, documents, and more from your Mac.
You don’t have to worry if you have lost a file on your Mac after emptying the Trash by accident. This software can help you recover lost files with ease.
Lost your Word document on a Windows PC? Don’t worry. Use a powerful Windows data recovery software to recover it.
This DIY Mac data recovery software lets you recover deleted files in 3 simple steps – Scan > Preview > Recover.
How to Recover an Unsaved Word Document on Mac?
MS Word for Mac has an AutoSave feature, which works in the background and automatically saves a version of your document at a specified location on your Mac. By default, this feature saves your document after every 10 minutes.
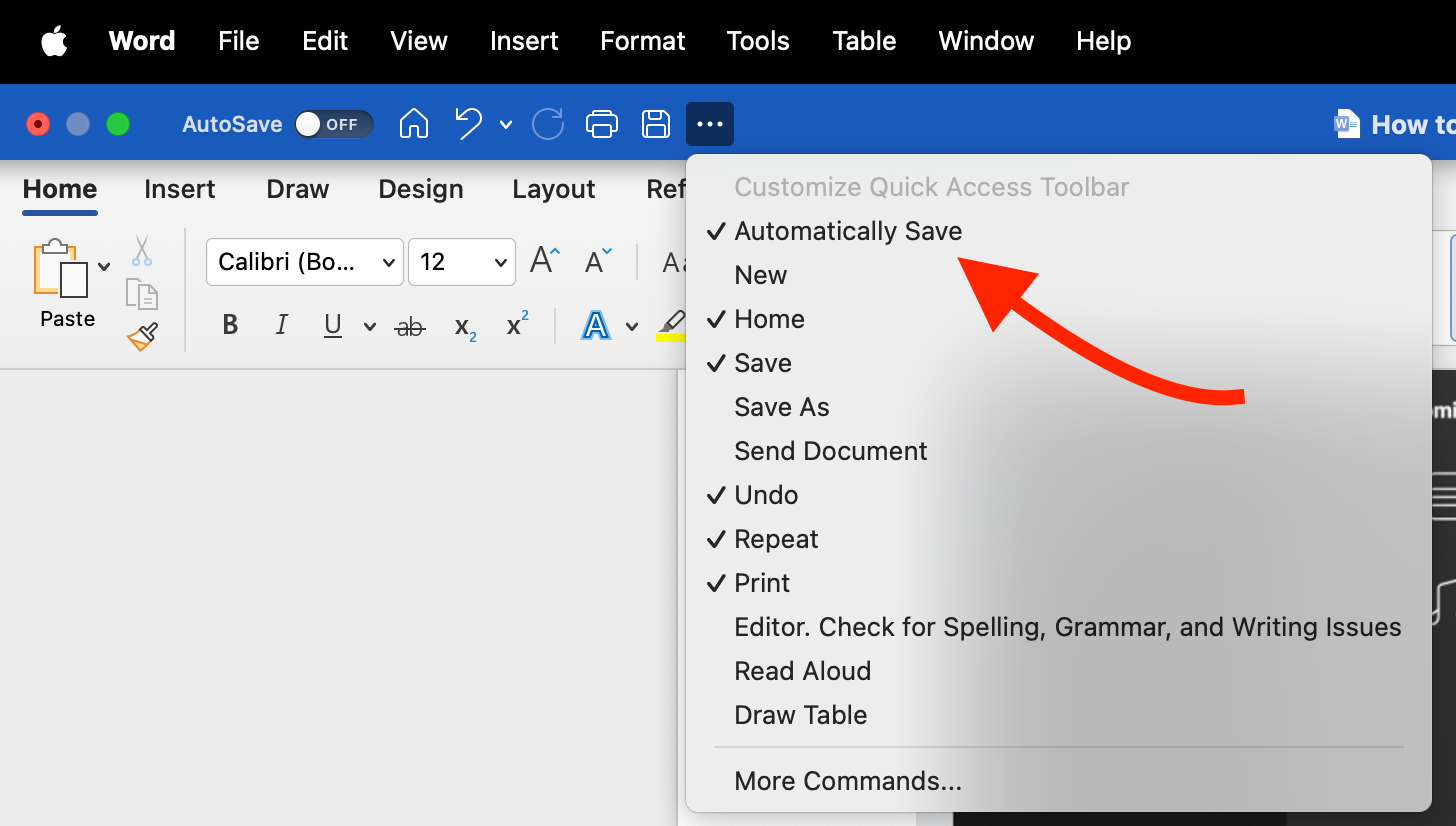
If you are using Microsoft 365, then the AutoSave is enabled by default. However, if you have downloaded MS Word from the App Store, then you will have to enable the AutoSave feature.
Therefore, if you have lost your Word document because your Mac or the MS Word application has crashed unexpectedly, you can use the AutoSave feature to recover the unsaved Word document.
Tips to Avoid Data Loss on a Mac
In addition to the above methods, we have compiled a list of a few handy tips that could help you avoid data losses in the future.
- Cross-check all the files before deleting them
- Avoid using the option + command + delete shortcut
- Use the 3-2-1 data backup strategy – three copies, on two different drives, and one off-site backup
- Configure Time Machine after buying a new Mac
- Create a backup of important files on an external drive
- Use a cloud service such as iCloud or any other cloud storage service
Conclusion
It is easier to lose files on a Mac because of accidental deletion. However, there is no need to panic as the methods explained above should help you recover the lost files. However, these methods will only work if you have saved the Word document. In case you did not press the command + S shortcut and lost the Word document due to the MS Word application or system crash, you can use MS Word’s built-in AutoSave feature to recover the lost Word file.